One of my favorite features of Dropbox is its ability to automatically sync photos and videos taken on my phone to my computer. No more thinking about Bluetooth transfers, cables or SD cards. Anywhere with internet, my files back up seamlessly. Contacts and their photos are automatically saved through my Gmail account. The only data left to back up are app settings and information, which I manage using Avast Backup.
Now, back to the main topic: after switching to a smartphone, I noticed something odd. Videos recorded with the phone held vertically would appear sideways on my computer. To view them properly, I had to record videos holding the phone horizontally, which is not always convenient.
After some research, I discovered a small program called Video Flip and Rotate. This tool uses FFMPEG to rotate videos. The FFMPEG website lists the commands needed to perform these rotations. Since I have experience with FFMPEG video conversions, I could write a script myself but the program simplifies everything with a graphical interface.
Here is a step-by-step process to fix your video orientation using this tool:
🔧 Step 1: Open the Program and Load Your Video
Launch Video Flip and Rotate.
You can open your video by clicking File > Open or simply drag and drop the video file into the program window.
Once loaded, the original video will appear on the left side of the screen.
On the right side, you will see a preview panel showing the video after rotation.
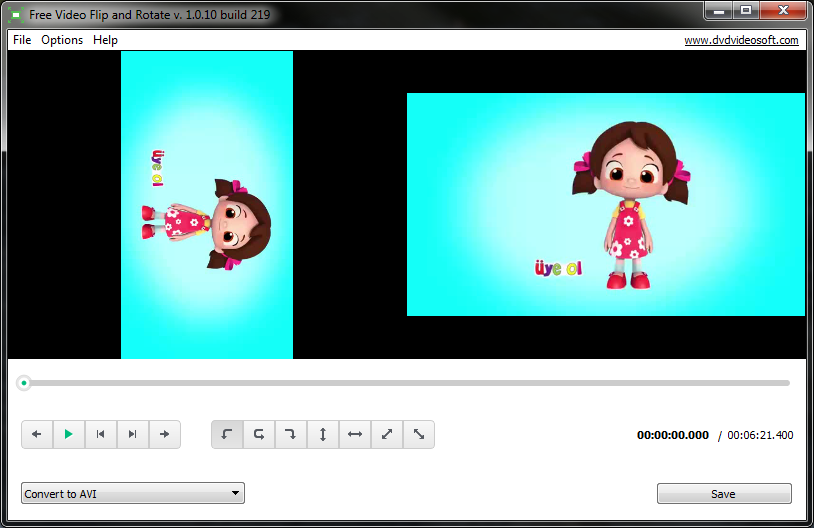
🔄 Step 2: Use the Rotation Buttons to Adjust Orientation
Below the preview panel, you will find two groups of buttons:
Navigation Buttons (Left Group)
Use these to play, pause or move through the video frames.
Rotation Buttons (Right Group)
First button: Rotate the video 90 degrees to the left.
Second button: Rotate the video 180 degrees to the left.
Third button: Rotate the video 90 degrees to the right.
Fourth button: Flip the video vertically (top to bottom).
Fifth button: Flip the video horizontally (left to right).
Sixth button: Rotate diagonally from top right to bottom left.
Seventh button: Rotate diagonally from top left to bottom right.
Try these buttons until the preview shows the correct orientation for your video.
⚙️ Step 3: Set the Output Folder
Open the Options menu.
Choose your preferred save location.
By default, the program saves videos in Windows’ Videos folder.
Alternatively, you can set it to save in the same folder as your source video.
💾 Step 4: Choose Output Format and Save
At the bottom of the program window, select the format you want to save the video in.
Click the Save button.
A new window will prompt you to choose a sub-format or codec; select one and click Continue.
The program will process and save your correctly rotated video to the chosen folder.
⚡ Additional Tips
This program works efficiently for quick corrections without needing to use command-line tools.
You can batch process multiple videos by loading several files at once.
If you want to script your own rotations using FFMPEG, the basic commands look like:
Rotate 90 degrees clockwise:
ffmpeg -i input.mp4 -vf "transpose=1" output.mp4Rotate 90 degrees counterclockwise:
ffmpeg -i input.mp4 -vf "transpose=2" output.mp4Rotate 180 degrees:
ffmpeg -i input.mp4 -vf "transpose=2,transpose=2" output.mp4
Remember to always preview the output before saving.
This program is an essential tool on my computer and I hope it will be useful for you too when correcting phone video orientations.